how to

All posts in the how to category

Skateboarding part 4: protective gear- 1980s- present day. A Day at the Skate Park- my critiques.

Published August 15, 2019 by AntiqueMystique1

I did it at the skate park. I was told to leave by some teenage d-bags that, “This is a boys only park, so get outta here.” This teenage boy’s brass balls snide remark irked me, for one. Secondly, it further goes without saying that skateboarding is still a “male” dominated past time and this will never change.

And third, it solidifies my previous feelings about this upcoming rude punk a$$ generation: they are raised by the internet, not their lousy parents. They have no respect, no morals, either.

Well, that’s just tough. I stayed and made my videos much to the irritation of those morons aiming a hand-held megaphone that was equipped with police siren effects and other annoying đŸ’©Â .

I cursed under my breath as I did a few laps on an empty basketball court. The NOS Rector pads felt okay, flexibility in them was amazing for being decades old. I didn’t put too much faith in my new mass-produced Chinese elbow pads since they do shift on my elbows.

I watched those never-will-be posers take their spills while attempting to grind rails, do verts on the metal half pipe portion. Ah, yes, the days of old– their skateboards went flying over the edge of the half pipes, but they never attempted to make a half-a-rat’s assets to practice, practice, practice their tricks. They just did it once, gave up and sauntered back to their picnic table.

Most of the time they were glued to their phones, seldom looking (nor doing) anything else. Their skateboards scattered on the ground like spilled Legos. Never in arm’s reach, never sat upright, either.

No audible conversation at all amongst them. I found it odd that they were so pre-consumed by their cell phones and didn’t bother to provoke me anymore. One of the boys very lazily strode to the highest half pipe; put the megaphone on police siren aimed in my general direction and returned to his lazy pack. And this is supposed to irritate me that I give up and leave? Ha! Such ineptness.

There was just too much immaturity running amuck that it made me wonder why I got out of bed on my day off? Oh, yeah, right. I wanted to test out my NOS gear, plus skateboard around (cruise) on my new deck to break it in more and see how it preforms on different concrete. Maybe pull a few front nose fakies. I never said I was ever going to attempt these with a devil-may-care attitude. I take my time, I take it slow since I know my limitations and don’t go beyond those unless I feel confident doing so.

My outing on this beautiful, albeit humid, sticky, gross heat of midday wasn’t all for naught. I brought my other “go-to” board “weeble wobble”. Yes, I will adjust those king pins to remedy this issue all skaters encounter. I’m still in my ‘shake down’ period right at the moment and figuring out what works and what doesn’t.

The best gear I know and love will always be Rector. It fits very true to size and won’t shift. The size smalls run very small, mind you. This is fine by me, but may not work for the next person. My helmet probably pre-dates 1985, and it’s light weight.  My gloves are all new old stock. I ditched my long board gloves since the size small/medium were WAY too big on my hands. I never wanted anything new again.

I made myself have fun on this hot day.  I slid down the metal half pipe; remembering my old practice runs from back in the day. The metal was screaming hot and on bare skin… Ouchy! Woo-hoo!!! Alrighty then…

Keep in mind that the city planners were idiots when this skate park was built. The metal half pipes can be ridden, however, its sheet metal meeting a not-so-level slab of concrete.  The metal has a lot of  questionable “give” and does produce a creepy, unsettling loud ‘ping’ sound as the wheels make contact with its surface. So skateboarders beware. I say take caution when attempting to ride this to all skateboarders, not just newbies. I caution the seasoned, the intermediates, etc. There are no plywood half pipes. When I first took up skateboard 30 some odd years ago, I learned on plywood, even helped my oldest brother in the final construction phase of his first half pipe. It was a real learning experience, very grueling hard work, and once completed– very scary, yet exciting and exhilarating to be the first to test it out.

Nowadays, I take my skateboarding slow. I’m not about to risk a bone fracture by skateboarding at break neck speed. My attempt at front nose Fakies are taken with  cautious approaches. I’m there to get the feel of both board, wheels, and terrain underneath my feet. What do I need to correct on the hardware, if any adjustments need to be made? That kind of assessment. And its all about having fun within one’s own ability.

I stood atop a massive slab of steep concrete that jutted out of the pavement like a pyramid with the point left unfinished. I’m not here to be grammatically correct with any skateboard terminology, by the way. I’m trying to describe the skate park layout. There are tiny rails anchored into the pavement. I view it as another accident that could mangle beginner or even intermediate since they were placed too damn close to the proximity of each half pipe. I’m observing as a spectator and an old-school skater.

I watched the lazy punks take many spills. There popsicle decks went skiddering, the wanna-be skaters tripped head over heels every time. They skated poorly like something out of Skater 3, a video game. I wouldn’t have even put them in a poser category nor even beginner. Perhaps a weekend warrior at best.  There was no true form nor unique style all their own that I could see. They sported tattoos and smoked cigarettes. They rode the half pipes with no zeal. There wasn’t even any ounce of passion. It was like bland nothing-ness. Almost giving off a ticked off message to the world that they didn’t want to skateboard, but did so anyway just out of boredom, perhaps.

It was like watching a dull skateboard follies without a laugh track nor any blooper sound effects. They just went up the half pipes without any real sense of feeling. There was none of this: “I’m awesome!” or “Look at me!” And there was zero sense of “practice makes perfect” attitudes nor even any positive energy, either. To me, that was very odd. In my day teenagers couldn’t wait to out-best their friends or try to impress them, either. Teenagers of my generation took a tumble, jumped up, and kept trying it over and over again until they felt they got their tricks partially correct to their liking. But I see none of this in today’s youth, nothing but this massive laziness boredom. And god-forbid if their Ipads or cellphones just quit working due to some cosmic solar interference, they’d have a snowflake meltdown and need to find their “safe” place.

Teenagers in my day would have thrown their non-working cell phone or Ipad in the street and went on their way regardless of what caused it to quit working. They might have retrieved said device later if their parents made them, other than that, an 80’s teenager was vastly different to this generation. And I’m sure the generations of teenagers before my time might have taken similar approaches to modern technology, perhaps.

I didn’t detect angst, per se from the lazy teenage boys at the skate park. I mainly sensed it was for them just killing time between texting their friends, like something to do to pass the time before they had to head home before another school day rolled around.

I wish I could have “shredded it” as one older male with long hair cheered me on as I strode over to the skate park looking like a throwback of a typical early 80’s skateboarder. I gave the long-haired older dude a warm smile in return, nodding in approval, and gave him a ‘thumbs up’. My old Rector gloves linger with the new leather scent, “fresh out of the bag” newness/ Saddle soap treatment. All is awesome applesauce on this day and I don’t let the snide remarks deter my determination to stay at the skate park. 🙂

My old stock Rector pads lovingly shed their black lining like an affectionate cat. I remedied the sticky rub-off with non-GMO cornstarch and aluminum-free baking powder before I left the house. I figured it would also combat chaffing and sweat build-up.

I ignored the teenage village idiots seated at the picnic table. I practiced my falls, sliding on my knees, just having fun again that I hadn’t got the chance to have in many, many years.

I didn’t try any dismounts since I was putting the old pads through their first ever durability test runs. I felt no unpleasant jarring aftershocks striking concrete and metal. In fact, my knees were cushioned the whole time and comfortable.

Concrete though isn’t a good sliding surface, by the way with pads. The metal will scorch skin and that’s the only thing that burned. Otherwise, Rector pads get two thumbs up 👍. And that’s my initial critique on the new old stock gear. I never tried out the Clawz gloves yet since these were probably first generation designed for the second generation of skateboarding in 1989-90. They were for street skating, but do not have any full wrist support at all. The only minimal support (if one can call it protection) is a Velcro wrist wrap design. I used one Clawz glove back in the day without a thought that there was really no wrist protection at all. These were made of suede leather, minimal pads sewn on the palms, top leather with Clawz logo sewn into the glove. The Clawz logo is prone to cracking as with anything vintage and being thirty years old is to be expected.

Also, eBay is an excellent source to find a lot of vintage skateboard stuff at reasonable prices. Depending on the seller(s), they may even offer best offers and free shipping within the United States. Hope this helps. I’d also include Amazon as another online buying source for skateboard related stuff, but I find that eBay is vast and has more to chose from.

Just a word of advice buying on eBay: always try to review seller’s feedback rating. If they have a ton of negatives, I’d recommend shopping with another seller since you may (or might not) get the item(s) you purchased on there. And its a let down, believe me when the item you work hard for never shows up in the mail. It happened to me recently with a couple of rock n’ roll trading cards, although the seller was very quick to issue a refund, I was searching for the cards for last couple of years. So, it just a matter of buyer beware on eBay. It’s still a good place to find anything you a person could ever possibly want/need/ add to an existing collection, etc. The selling aspect would be saved for another blog entirely.

Thanks for liking, blogging, following and sharing. And please, stay tuned for more future posts from me when I can find the time to do so. Have a great day everybody and happy skateboarding! 🙂

By the way, have any skateboard related questions? Please, feel free to send me a comment on here and I will be happy to respond to the best of my knowledge.  Mind you that I don’t know a whole lot about how to do skateboard tricks and I’m still learning myself even after all these years. I have very minimal skateboard mechanics under my belt (self-taught), but I do try. I am a very old-school fashioned skateboarder though.  🙂


Antique Fountain Pens: where to buy and how to use them.

Published September 30, 2016 by AntiqueMystique1

Writing is difficult enough as is nowadays. Can you imagine that somewhere during 1955 through the 60s all public school children were taught how to use a fountain pen and ink well? According to one such tutorial website I gleaned some helpful insight into the often ignored bygone use of a fountain pen.

Oh… are those the fancy quill pens with a beautiful, graceful feather, right?


Well, okay, maybe those can be included too
but I was more inclined to add the Calligraphy pen/ fountain pen, and one thing that had always piqued my interest was whenever my great grandmother would write me snail mail letters. She would always write in this extremely fine penmanship that was lost to my generation. How can I describe her penmanship? It was dainty-like. Her cursive always straight even in cards and pages that weren’t notebook paper. Her penmanship was always graceful and it  always garnered my interest. It was always the same ‘sepia-tone’ brown ink, sort of faded that I knew wasn’t possible from a standard ball point pen. And I knew that no writing pen no matter how cheap or crappy could produce such eye-catching legible lines. In fact, it had me so curious and I never did ask in my letters to my great grandmother what type of pen and brand of ink she used. And for the life of me, I don’t know why I never asked. I only recall one time when she wrote to me in pencil and that was something that was very out of character for my great grandmother to do when corresponding in all the years we wrote to each other. I knew then something wasn’t right and my intuition was correct, sadly.

When my great grandmother could no longer write me back, I continued to write to her (wishing, hoping and praying) for a response only to no avail. By this point I had no idea how badly her mental health had declined. I was kept in the dark about a lot of the horrendous details of what went on while she was still alive. She required the assistance of a caregiver who didn’t look after her well at all. Were my letters thrown in the trash unread? I began to think to myself. They were getting delivered to somebody since I never had one returned to me during the entire time, so who knows.

I was intrigued, and me being… well, me wanted to teach myself this lost form of fountain pen penmanship, and as luck would have it, I purchased an old antique Palmer’s fountain pen writing instruction red soft-cover book. The book had been around with black ink stains on the cover, and a partial missing corner from its cover. I was missing two more things: a fountain pen and ink. The ink I use is India ink and a very helpful antique store owner told me to always water down the ink with cold water prior to use or else the nib of the fountain pen will get gummed up and the writing won’t appear as fluent nor clean, and always allow the page to completely dry first before folding it and cramming it into an envelope. I thanked the antique store owner (her name is Carol), but she couldn’t help me track down a bottle of brown ink and didn’t know if any even existed or not. So, the curiosity regarding where my great grandmother’s mysterious ‘sepia-toned’ brown ink came from will forever remain a mystery since my great grandmother is no longer alive to tell me or even show me.

It still didn’t stop me from picking up something a new form of long lost writing. And oh yes, I LOVE to write. I love it so much that I’m known to write incredibly long snail mail letters to family and friends and always have loved doing so. I’ve been told by strangers even that my penmanship is beautiful, graceful and very legible.

“Legible?” I think to myself. “Why wouldn’t my penmanship be otherwise?”

And here again my quest for knowledge was never-ending and I wanted to know why. I don’t ask, silly me. 😛

Instead, the answers I sought was a long time in coming, but eventually I would see why. I see a younger generation’s writing and doesn’t just stun me, it makes me nervous. It makes me crook my eyebrow and scrutinize every word and line. I cool it on my inner need to ‘proofread’ what they wrote. That isn’t part of my job requirements, but making sense of their writing is important, and if I can’t understand it, then miscommunication often occurs. And not to down on anybody that was born during the 1980s and are part of the millennial crowd, but boy howdy, I never knew chicken scratch was a perquisite to learning how to read and write while in elementary school nowadays. Actually, most of it I can’t even say is chicken scratch, it’s likened to pre-school scribbling and its coming from a twenty-something youngster.

So maybe it will sound as though I’m being hard on these millennials, but their writing is atrocious. Any English teacher would cringe if they saw it turned in on a hand-written assignment and their butts would be served to them on a silverplate platter because of it.

In my line of work I have to jot down any information that would be pertinent if ever a situation arises while I’m on the clock. There are days when nothing happens, and then there’s the hectic days where anything can happen and it needs to be logged.

And then there’s the pre-school scribbles that often appears and misspelled words. I try to decipher it the best I can, but the writing is often very illegible. Now I see why I’m told my penmanship is legible and this is thanks in part to my older brother who taught me cursive writing when I was young as four or five years old. Yes, that young believe it or not because he didn’t want me to go through life not knowing how to read or write since public schools would barely cover the bare bone basics of reading, writing, and arithmetic (a bygone name for mathematics). My older brother was already in school at the time and was a few grades a head of me.

In retrospect, I sincerely believe we came from the last generation that was taught cursive writing when it was still being taught in public schools during the 1980s. I later read that anybody that attended public school post 1955-60s lost out on learning how to use a fountain pen and ink well though. And it brings me back to the antique writing instruments of yesteryear. They can range in price from a dollar on up to a few hundred. And it depends on the make of fountain pen and when it was produced.

When I attended college in 2013 (per my course requirement), I had to log into a message board to converse with the instructor and fellow students, and while on there, somebody chimed in how excited they were to receive a fancy pen with a very fluent, sensitive response. Well, they weren’t talking about a pen you write with. They referred to a stylus pen for their Kindle or some other technological touch-screen device.

I barely batted an eyelash when I figured out it was a pen for a touch screen device.

I don’t get all s**** and giggles over technology. In fact, I don’t find myself running out to buy the newest updated computer setup. I don’t have any new generation Kindles on my wish list and all of my stylus touch-screen pens came straight from the Dollar Tree where everything’s a dollar. However, I do collect antique fountain pens and antique ink wells. Some are very basic heavy glass, I’d say likely used in the rural public schools way, way back when. And other ink wells I have are slightly more fancy with a pen holder and two ink wells with silver caps. And another one I turned up recently has a brass design around it. I don’t know the specific dates when these ink wells were produced, but the fancier ones I’d guess were produced in the 1800s or very early 1900s. The basic no bells or whistles ink wells could likely date anywhere in that same time frame. The antique fountain pens I have scattered in an old wooden cigar box are plastic with brass nibs, which tells me they were produced post- 1930’s probably in the 60s or 70s maybe. I have about four or five fountain pens that go way back to the early 1900s and these I didn’t acquire all at once. I would occasionally run across them in the antique stores from time to time, and if they appealed to me, I’d buy them. At least fountain pens are a light-weight antique item to collect unlike my Bavaria porcelain dishes and silverplate.

And so I’ve returned to practicing my fountain pen writing. This is something I enjoy doing in my spare time when I can make the time that is. I do it mostly for fun nowadays and I’ve read that it isn’t so much what you write but how you hold the pen which is balanced on your knuckles and not clutched between the thumb and index finger. It was awkward for me to try at first, but once I quickly got accustomed to it, my writing was less complicated and flowed onto the page a lot easier. And this is all for my blog about antique fountain pens and ink wells. If interested I’m sure places like eBay, Etsy, and Ruby Lane might have fountain pens and ink wells for sale. Thanks as always for reading, liking, blogging, commenting and sharing. I truly appreciate it.  🙂

Benefits of Banana Peels.

Published May 28, 2016 by AntiqueMystique1

Banana-Peels

The benefits of a banana are amazing and I can’t say enough good things about bananas, in general. They taste great, are very high in potassium…


But what about that peel? Don’t throw it out, eat it! That’s if you want to. Yes, the banana peel is edible.

Now I don’t buy into the ‘landfill/ banana peels cause global warming’ debate that those are inherently evil for the environment when discarded in the trash here in the U.S., because, they aren’t. And whoever wrote that particular article claiming such, likely didn’t do their research  first or just cut/copied/ pasted something to their website, more than likely. Or… perhaps they don’t have a green thumb  and never stepped foot inside a garden, own a micro-mini farm, a compost heap, or so much try to be like the few out there that do manage to go off-grid and live a self-sustaining lifestyle.

My banana peels break down just fine in my compost and my rose bushes love them and they decompose rather fast, too. The banana peels will give back to the soil which is nutrients which in turn gives flowers and plant much needed food to survive and they make awesome compost! And you don’t have to shell out a lot of money for the bone meal and blood meal products that can be expensive and they don’t give as much in a tiny box.


But a lot of folks recommend either frying, baking or cooking the banana peel before it’s consumed to make the tough outer skin a little more easier to digest and soft.


What about pesticide residue on the banana peel, if it has any that is? Wash the banana peel and then soak it in a water bath would be my advice. I would refrain using tap water though. Tap water can have bacteria. I will always advocate steam-treated distilled water. That’s what I use to soak all of my fresh produce in. And if it’s a veggie, then it gets some Bragg’s Apple Cider vinegar and regular apple cider vinegar.


Until recently though I’ve let my rose bushes have all the banana peels and other times they went straight into my compost pile. So long as it is non-meat and no fish it can go into the compost, so that was that or so I thought.


I recently tried rubbing a banana peel in my hair because there’s some benefits that will help to soften and give much needed nutrients to the hair follicle. It’s too soon for me to say whether or not I’ve noticed any difference as opposed to when I use the aloe vera leaf juice (that clear slimy stuff) that does make a noticeable difference in how my hair feels soft and becomes shiny. So I will keep an update on the banana peel hair care DIY.


Also, there’s even more benefits from a banana peel such as a natural tooth whitener. But this I discovered didn’t work for me, personally as great as the crushed fresh strawberry did to whiten my teeth naturally. Then of course you’ll have to follow-up with a regular brushing afterwards. And this natural tooth whitening should only be done once every two weeks or so I’ve heard, but not everyday as I’m sure it might be hard on the tooth enamel.


So, I did more reading on the edible banana peel. And I also did more research and now it’s off to see if these banana peels really do pack as much vitamins as one would need in their diet. Some folks claim banana peels will taste bitter if they’re not cooked, baked, or fried. I happen to be the rare few that do like some edible things to be tart and bitter tasting. Just how many vitamins does a banana peel contain? Let’s see here


12 % of daily fiber.


17 % of vitamin C.


20 % of vitamin B-6.


12 % of potassium.


and


8 % of magnesium.


And there’s plenty more benefits using banana peels than just eating them. They can help fight acne when applied to the skin. They can soften the skin and work wonders for the hair.


I tried rubbing a banana peel on my face, neck, and arms and it does make the skin soft. And if you’re one of those that suffers acne breakouts, (I don’t anymore now as an adult), rubbing a banana peel on the acne might be a healthier and more natural alternative as opposed to the expensive dermatologist prescribed acne creams and over the counter acne products.


I remember when I used to have bad teen acne and had to get a prescription (high strength) roll on acne medicine and it was the equivalent to 100 % rubbing alcohol. But whatever ingredients that acne stuff contained, did it ever like to burn my sensitive skin, yikes! I had to refrain from going out into the sun and exposing myself to UV rays after application anywhere from five to twenty minutes.


I don’t remember what the name of the prescription was called and this was before the days of Pro-Active acne treatment. All I do remember about the stuff is that it felt like my skin was burning off (like battery acid was applied to it) and it would turn red where the solution was applied on my face likely either a chemical burn and/or allergic reaction. And then, try to wash your face afterwards—forget that. My skin would be so raw that I could feel the heat radiating from it like a nasty sunburn, so it had me thoroughly convinced that prescription acne stuff was bad.


Thankfully my teen acne at the time wasn’t severe. It was bad, but tolerable and I still don’t believe that getting that prescription was the way to go. The over the counter acne stuff could only do so much. As a teen I never questioned, gave it a second thought or even so much glanced at all those chemicals and ingredients in all that pre-processed junk food I consumed like the occasional frozen pizzas, the pizza snacks, the soda pop which was probably by and large responsible for a lot of my teen acne due to its loads of sugar and high fructose corn syrup. And oh, yeah, the candy and greasy fried foods, can’t forget those. Mind you, I ate this whenever my parents stepped out for the night which wasn’t an every night deal.


Oh, and that prescription acne stuff worked wonders stripping away a label from a cassette tape. The acne stuff must have contained something very harsh in it since it stripped off entire labels in one application as well I found out when trying an experiment with it. And when I stumbled onto that weird discovery, I quit using said prescribed acne solution and returned again to using over the counter products instead, and did so sparingly so I could give my skin a chance to heal.


Had I known back then about all these wonderful, inexpensive, nearly all-natural home toner, face, and acne remedies you can get from fruit and other common healthy fresh produce I would have opted for that any day of the week than ever having subjected myself to some ‘god-only-knows’ what harmful chemicals were in that prescription solution of acne medicine in a roll-on bottle.


But when I was a teenager I didn’t have any decision-making whatsoever when it came to what I wanted to use and/ or try. It was often whatever my parents decided for me and that’s how it was going to be until I was eighteen and living on my own. However, I still argued and complained like any other teenager in my shoes might have done. Oh and everything had to be dramatic. Can’t forget that teenage drama, either. At least there was never a dull moment.


And what I love most now that I am an adult is that I can make my own decisions. Thanks for reading, commenting, re-blogging, tweeting, liking, sharing, etc. and to all my fellow bloggers and new followers, thank you! I truly appreciate it. 🙂


Chia seed Carbo & Chocolate Cookies with Chocolate Dessert Topping- My Recipe

Published May 24, 2016 by AntiqueMystique1
choc dessert topping

My homemade chocolate dessert topping drizzled… eh, rather adhered to a frozen banana, sliced fresh strawberries and topped with sumptuous unsweetened Carbo chips.

I created maybe not the first chocolate dessert topping out there, but the most chemically-free one for that matter. In my endeavor to remain as healthy as possible I don’t consume sugar. I substitute it with raw honey. And there are certain treats in life I won’t deny myself. If it’s an unsweetened baking cocoa bar, Carbo unsweetened chips (it tastes like actual chocolate, but isn’t), or unsweetened baking cocoa powder count me in. I certainly put the Carbo chips to the test and they won me over when I made both chia seed Carbo chip cookies, and my first ever attempt at making chocolate cookies. I had the idea after I’d seen a pre-packaged deal of sugar and chemical-laden overkill called “soft-baked brownie chocolate cookies” or something to that effect, and since I no longer consume sugar, reviewed the ingredients of said package of cookies and there were more chemicals and sugars cleverly disguised by other names and maybe three or four actual ingredients that went into making the bad junk food cookies. I jotted down the ingredients and moseyed over to the baking aisle of Dollar General and discovered a brownie recipe on a box of Nestle Tollhouse baking cocoa. I didn’t need the baking cocoa so I jotted down that recipe, paid for my distilled waters and returned home. I didn’t expect my improvised cookie recipes to turn out. And before this I never made pure chocolate cookies. Since I already had all of the ingredients on hand, I decided to give it a try.

The Chia seed & Carbo chip cookies were excellent I thought. And the finished result of my chocolate cookies? They turned out good, if not, great. I believe I ate about five in one sitting and made half the recipe using some ground flax seed, but not much since it can act like nature’s laxative. In the Carbo chip cookies I threw in some organic raw unsalted pumpkin seeds, organic unsalted (plain) sunflower seeds, some qouina seeds, Nature Nate’s raw unfiltered honey, two Teaspoons of Rumford’s aluminum-free baking powder, a pinch  of Redmond’s Real Salt, One cup of whole wheat flour, two palm-sized handfuls of unsweetened Carbo chips, one raw egg *(please note, the egg is optional, but DO NOT eat it raw due to possible Salmonella, a.k.a. food poisoning if egg is used). This Chia-seed & Carbo chip cookie recipe can be made without the egg, but you might need to use a little more water to form a dough.

I already had my cookie sheets lined in foil and greased with coconut oil so clean up is easier. Whenever I use water in my recipes and for cooking I always go with steam-treated distilled water and/ or Hiland Drinking water. I never ever use tap (city) water due to it’s nasty fluoridation and potential bacteria surprises. And the amount of distilled water I use in my cookie recipes will vary. I prefer to use just enough so the dough is between sticky and yet able to be dropped onto the cookie sheet by the spoonful. And the amount of honey I use also varies with each recipe.

My Chocolate cookies recipe (this turned out a lot like a brownie):

I like to melt down one square of Baker’s unsweetened chocolate, add in one palm-sized amount of Carbo chips, 3/4 cup of Nature Nate’s raw unfiltered honey, 2 teaspoons of Rumford’s aluminum-free baking powder, a handful of ground flax seed meal (optional), a pinch of Chia-seeds, two heaping spoonfuls of unsweetened baking cocoa, one egg (sometimes I skip the egg and just use distilled water only) one, sometimes, two cups of whole wheat flour. I make my chocolate cookies a lot like I do with my Chia seed & Carbo chip cookies. I pre-heat my oven to about 350 degrees and bake the cookies for about fifteen minutes and watch them as they bake so they won’t burn. When a toothpick inserted in them comes out clean (and depending on how well done you prefer), remove the cookies from the oven and let them cool down on a wire rack. Since I like my cookies to be on the soft side I’ve never had success making thin, crispy cookies. I like to store my cookies in an air-tight container in the fridge. I also had some condensation issues with my cookies if I place them into plastic zip lock bags and store them in the fridge without allowing them to cool off completely first.

Both cookie recipes should yield about 12 cookies (depending on amount of the ingredients used) and have a shelf life in the refrigerator up to four days. Nothing beyond a week as these cookies will turn moldy. I don’t use yeast or any other ingredients other than what I’ve mentioned.

For my home made Chocolate dessert topping you will need the following:

Hershey’s unsweetened baking cocoa powder and/ or any baking cocoa powder will do. I prefer the unsweetened baking cocoa since I laid off the sugar as much as possible except if it’s already in the food to begin with. I like to add three Tablespoons of cocoa baking powder into a sauce pan, then break off one (sometimes two) small squares of Baker’s brand unsweetened chocolate, place this in with the baking powder over low heat, pour in about three or four Tablespoons of raw honey and allow the ingredients to melt. If you put this on medium or high heat it will burn and your sauce pan and utensils will have to soak overnight. I watch this stuff like a hawk so it won’t burn and through my many attempts found out that I love to melt just raw honey and the unsweetened baking cocoa together.

Next, you’ll want to stir this constantly, and then remove it from the burner once its melted, and the chocolate baking powder is absorbed. For an added natural sweet treat, try adding in some sliced banana, washed and cut fresh strawberries and blueberries and top it off with Carbo chips. This kind of  reminds me of Fondu in a way, but tastes very similar (in my opinion) to chocolate Sunday dessert topping but without all the loaded down heavily pre-processed chemicals. It is rich, so a little bit of my chocolate topping goes a long way. By the way, I haven’t tried this over ice cream since I don’t consume dairy products whatsoever, but I’m sure it would be excellent on ice cream. If I had to recommend a brand (or more than one), Ben & Jerry’s as I heard they were at one time supposed to be all-natural, and also Breyer’s ice cream. However, the true ice cream I ever enjoyed growing up was homemade using rock salt, ice, fresh cream, sugar, milk and mixed in an antique hand crank ice cream maker. I haven’t tasted any commercial ice cream since that could ever top homemade.

On a side note the Carbo chips are a lot like chocolate chips and can be found at your local health food store. The Carbo chips also come in the semi-sweet, and sweet varieties as well. The Baker’s brand baking chocolate comes in unsweetened (orange box), semi-sweet baking bar (comes in a red box with a depiction of a slice of chocolate cake topped with a few raspberries), Baker’s White Chocolate and Baker’s German Chocolate. The Baker’s Semi-sweet chocolate will have either 6 or 9 grams of sugar in it. I don’t know how much the others contain since I don’t buy them.

Thanks as always for sharing, liking, re-blogging, commenting, tweeting, etc. I truly appreciate it. 🙂


A Wonderful Day for a Wok and San-J Tamari Soy Sauce..

Published May 20, 2016 by AntiqueMystique1

I’m referring to Chinese and Asian cooking that is. I recently purchased a 14″ Imusa wok and couldn’t be happier with it. Before I made my purchase I did a lot of price-comparison, reading reviews, and moreover, wanted to find a wok without a non-stick/ coated surface, but don’t think I succeeded. Why not go with a coated or the non-stick kind, you might ask yourself. Because harmful chemicals in those coated and non-stick varieties can leech out when cooking, and granted, I have no idea if the one I purchased is non-stick/ non-coated. It’s carbon steel though.

When I made my selection both woks I viewed at the store were identical. The only thing that set them apart was the difference in price by a dollar or two, and by their handles. One had plastic handles. No thanks. And the other had wood handles. Both were made by the same company Imusa. One price tag stated non-stick, the other stated 14″ wok non-coated. Neither label on the woks indicated which was non-stick/ coated and which wasn’t. The labels just stated ‘seasoning required’. I decided on the carbon steel wok with the wood handles. Woks, no matter the brand, will require seasoning before using them. I even looked at an $8 non-stick coated wok at Big Lots and wisely decided against it. It was too small and flimsy for my needs.

The only con I have with my new wok is that it requires oil before and after although it’s not that much of a pain. Woks are one of those high matience fancy skillets kind of like dutch ovens are and so are nearly all cast iron skillets. So far it hasn’t distracted me from teaching myself how to make fried rice, and other Chinese/ Asian-inspired cuisine,  etc.

A wok is great for stir fry, something of which I truly fell in love with more than nine years ago. However, the cost for all the ingredients became expensive. Back then, however, I wasn’t much of a full time gardener like I am nowadays and didn’t know the benefits of going outside and plucking my produce next to nearly nothing nor was I aware of freezing the stir fry ingredients like snow peas, onions, green bell and red bell peppers and whatever else appealed to me, either. And back then I didn’t kick my chicken habit or that of my pre-boxed Minuet white rice addiction. I haven’t had much success with fried rice yet but I keep trying. I believe this is because my rice turns out gummy from sitting overnight in the fridge and/ or I must be doing something wrong when cooking it.

I absolutely love Sesame oil but it loves me back in the wrong way. Other than that I would highly recommend the toasted Sesame oil by Kadoya. I also bought another brand of Sesame oil by Sun Luck, which doesn’t seem to give me problems, however, I noticed it lacks the robust flavor. Maybe it’s just plain, not toasted sesame oil.

Some excellent soy sauce I recently discovered is San-J Tamari. It’s gluten free. For the longest time I wouldn’t purchase any soy sauces simply because they always were too rich for my system, for one. Secondly, the other brands of soy sauces have so much MSG, flavor enhancers, and other added junk and wheat ingredients in them that the taste was too much for me, that is until after much reading discovered some rave reviews for San- J Tamari soy sauce. I thought “… well, I’ll only waste about three dollars if I don’t/ can’t stomach it.”

Is San- J Tamari soy sauce vegan? From what I’ve read, yes, it is.

Is it strictly for stir fry, Asian and/ or Chinese cooking? Nope. San- J Tamari soy sauce is excellent on salads, hard-boiled eggs, raw cabbage leaves, tomatoes and avocados and has a meaty flavor without being too rich and contains no wheat ingredients. San-J Tamari soy sauce also compliments any meal just about.

Now back to the wok. Here are some do’s and “I can’t believe I just did that!” kitchen calamity learning experiences. Okay, maybe ‘disaster’ doesn’t quite fit, but oh, well… 🙂

The Do’s:

Do wash and dry the wok thoroughly, especially when the manufacturer’s instructions recommend to oil the wok in order to “season” it before cooking in it for the first time. Seasoning is basically a process that darkens the wok and creates a type of coating on the surface. Some regular cooking pans even the cast iron skillets and dutch ovens will require seasoning before use. A wok is no different.

I like to oil my wok with a little bit of coconut oil and/or used to use a drizzle of sesame oil and smear it around using a dry clean paper towel this way there’s no mess winding up in my laundry. Grease and oil is very difficult to remove from kitchen towels, etc.

The Don’ts when using your wok:

Don’t use metal cooking utensils when cooking with a wok. This will scratch and gouge the surface, and it was a mistake yours truly here made the first night even though I was gentle with the metal slotted spoon. Make sure to have some wooden utensils on hand when cooking with a wok.

Another useful healthy tip: Don’t buy used wooden cooking utensils, no matter how clean they appear. They can harbor nasty bacteria, have unseen surface cracks where dirt and other filthy particles can linger and/ or be splintered.

Make sure to buy new wooden utensils. If you opt to purchase used/ second hand wooden utensils you never know where they’ve been or what they were used for, and they may not have always been used for cooking meals, either. And wooden utensils can be breeding grounds for mold spores especially if the utensils are untreated or show a lot of use. I’ve recently bought one of those new ‘economy’ three packs of wooden spoons and like to refer to these as “get me by until I can find something better” wooden cooking utensils. But thinking way back to some similar wooden cooking spoons my mother had when I was a child, those were better made and lasted us many, many years without cracking, splintering even beyond their normal wear and tear. There was something that made those older version wooden spoons of yesteryear better made from higher quality wood, perhaps and I’m just guessing on that.

The three pack I bought in a pinch made me seriously question if I’d get nasty  splinters in my food or lodged in my intestines. The new spoons were rough cut with jagged edges and so poorly made I couldn’t believe the quality was so shoddy they were allowed to be sold. I scrutinized all the wooden spoon packs they had at the store which weren’t many, by the way and the workmanship is very crappy. I realize that hardly any wooden spoon set out there will even be worth $3 (and I think paying $8 is excessive for a very rough produced bamboo set, too). I decided to use the cheap three pack of wooden spoons for something else other than cooking, like gardening or stir sticks for when its time to re-paint.

I went to the new small grocery store and in my “hustle my bustle” usual manner when its late I found a Chef Craft heavy handled beechwood spoon for $1.79. That’s a far better price and the quality was surprisingly better in my opinion. In fact, I was so impressed with the heavy handled Chef Craft brand beechwood spoon, I bought a second one later on. So far they seem to hold up well cooking with the wok and its been little more than a week. However, I never leave the wooden spoon unattended in the wok while my food is cooking. I like to use one of my old Corningware dishes as a spoon rest.

So for the least amount of money the Chef Craft brand wins. Now as far as how long these particular wooden spoons will last, I have no idea. I assume quite a while with normal use just depends. And I discovered I had a Sushi mat, chopstick and rice paddle set that I just got around to trying out for the first time.

Honestly, I have no prior experience using a Sushi mat. I had to watch several different tutorial videos on how to use a Sushi mat and it requires the right ingredients. But since I’m extremely allergic to Seaweed, (this is what the rice, raw fish, etc. has in it), I instead opted for cabbage leaves and Turnip greens. It was just my personal preference for the cabbage and the Turnip greens were on sale and never tried those before until just recently.

And please don’t nag at me that I didn’t use the correct type of rice in my first Sushi knock-off experience. I don’t get uptight if the rice isn’t what so-and-so uses. I use whatever rice is either organic (whenever possible), and nutrient rich (not bankrupt like most ‘enriched’ and ‘parboiled’ inexpensive rice brands are). And I like to stretch my rice and mix it with wild and/ or brown and Basmati rice (again finding a non-parboiled and non-enriched brand can be tricky at times). Don’t know if Basmati rice is any healthier but with nearly all rice, it might contain trace amounts of arsenic.  So boil, boil and BOIL that rice for at least 35-40 minutes on the stove top. The recommendation is 25 minutes, but I go the extra mile and drain the water off and use a little fresh distilled water in my rice so it won’t stick to the pan after I cook it. Do I always remember to fluff my rice with a fork? Not always and it still turns out okay for my taste.

Using a Sushi mat flattens the cabbage leaves stuffed with cooked rice and tuna I found out and keeps everything from spilling out. I also tried using Turnip Greens as well but noticed those didn’t do good at all and I find they don’t make good Seaweed subsitutes, either. I later found out that Turnip greens are supposed to be cooked, but seldom eaten raw like lettuce. I’m no gourmet chef and will attest to that. I live and learn like the rest. 😀 I do love food and enjoying trying new dishes at least once. I will more than likely pass on the Turnip greens from now on.

What I couldn’t understand according to one youtube Sushi mat tutorial video by a how-to beginner why the lady placed a Sushi mat in plastic wrap. As she went onto explain in the video it was to prevent the Sushi mat from becoming messy and dirty. Messy… eh, excuse me, but dirty, seriously? She sounded like one of those women that just can’t stand the thought of a making a mess and everything has to be perfect and very clean.

And she seemed more overly concerned about how clean her Sushi mat and work surface appeared than about getting down to the task and showing the viewer how to make Sushi rolls and there was a lot of missing ‘step-by-step’ instructions as well. By the middle of the video and this woman’s worry over “Cleanliness is next to Godliness” Florence Nightingale mentality, I was scratching my head with a slight perturbed look on my face while having a good laugh. That’s why you reach for the scouring pad, a little bit of Ajax and some dish soap and water to clean up the counter tops after having fun in the kitchen. That’s why if any mess falls on the floor and your little furball four-legged vacuum cleaner doesn’t like cooked rice or bits of Seaweed, you bust out the broom and dust pan and simply clean it up. I began to wonder if this lady wouldn’t be one of those kind to just suffer a public freak out mental breakdown moment, curl up into a fetal position and try to find her ‘safe place’  if she ever came face to face with a soiled Sushi mat that wouldn’t come completely clean. As a viewer I couldn’t watch this particular Sushi mat tutorial all the way through and had to find a few more that had better instructions and that were thorough instead of being vague. I won’t knock the lady’s ‘give it a try’ spirit though.

And one thing I wanted to add about wok cooking, the veggies will be crisp (not wilted or mushy) and it all depends on the temperature setting used. I use medium-low heat when making stir fry and lower setting when I’m re-heating my leftover rice.

One dish I do love is wild rice, fresh washed and sliced Jalapeno pepper (about four slices since they’re hot), and for some real heat try some Sarreno chili pepper (extremely hot in my opinion) and that’s if you’re a fan of spicy-hot dishes. So it’s not nearly cooking Asian or even Chinese cuisine, but eh, I enjoy it. And I also use some of the San- J Tamari Soy Sauce, a dash of Redmond Real Salt, and a dash of black pepper (whatever I have on hand in the Hosier). As always thank you so much for sharing, liking, re-blogging, tweeting, commenting, etc. I always appreciate it. 🙂


Get the most out of your store-bought celery: grow it yourself and other inexpensive kitchen food discoveries.

Published May 14, 2016 by AntiqueMystique1

celery leaves drying for aloe vera blog


And that was another very easy nearly ‘free’ food I found out about two years ago. Surprisingly my first attempt yielded celery during the first freeze we had last year (before winter set in, that is). Now the celery chutes don’t get terribly huge when going form the container growing method. My first celery stalk growing experience left me with small, slender stalks that were young and still went great in soups and salads. They also froze extremely well.


Living on a shoe-string budget is tough and wherever nearly free food can be discovered, grown at home, frozen, dried (think in terms of long-term prepping), or even so insanely easy to re-plant and grow I find myself scratching my head thinking, “Why didn’t I think of this sooner? This is so easy!”


And my first celery stalk was chopped off mid-way and sat in a bowl of tap water (before I became wise about the fluoridation) on my kitchen window sill. I didn’t hold out any hope and thought my efforts would be a waste of time. Yes, my celery stalk had to share space with my beloved (although somewhat hearty soil-bankrupt) air purifying airplane/spider plant that’s been the dominant houseplant going on five years. I was surprised when I noticed leafy greens sprouting up from the lopped celery stalk. I can’t remember if I changed out the water or if that’s a necessary thing to do. Since my first celery stalk died during the winter and I had no place to bring it in out of the harsh weather, it didn’t last. Yet, I managed to re-grow enough celery from that first stalk to fill a large zip lock bag and I didn’t need to buy celery at the store for the whole year. When frozen about all celery is good for is using in stir-fry, soups and stews. I never had any success using frozen/ thawed celery in leafy green salads. But frozen celery goes great in my freshly prepared plain cucumber salads which means I don’t slather my cucumbers in any type of oils, mayonnaise, or commercial salad dressings since those don’t agree with my system. I make my own mustard-onion dressing that I will share in this post as well.


And a year later, I’ve nearly finished off my entire bag of celery. I haven’t tried to grow any celery stalks in the garden. I like to plant them in patio containers and snip off the stalks as I need them and allow the celery to re-grow more chutes. I have two more celery stalks that I re-grew using distilled water and was surprised when they appeared greener and more heartier. I transplanted those to outdoor containers recently and started on my third celery stalk in distilled water. Hopefully it will grow as well as the others.


How to make my onion-mustard cucumber salad dressing:


Wash, cut and place green onions in a clean mason jar. I like to use a pair of kitchen shears to snip the onions. And other times I will go out to my garden and cut off a large onion leaf. These are very potent and a little bit goes a long way. I also use the small onion bulb as well and chop that up. Next, I mix equal parts of Dijon and Spicy Brown mustard and add that in with my onions. I stir this concoction and leave it in the fridge while I prepare my cucumber salad.

How to make my cucumber salad (no-dressing or oil variety):


Wash, peel and slice up the cucumber if its store bought. Believe me, you don’t want to ingest the wax they use on the veggies. I’ve heard horror stories that the wax used is no different than what they use to wax floors with, Yeesh! And if it’s true, that’s a dirty little inside trick to make veggies appear delicious and ‘preserve’ them, I suppose. If you can grow your own cucumbers and don’t use pesticides, you could skip peeling off the outer skin. Since I don’t use pesticides on my garden for the very reason they can be toxic, I don’t have to worry so much.


There’s no wrong way to slice a cucumber. If you like thick slices, got for it. If you prefer small, thin slices, that’s excellent too.


Next wash, and slice one or two red tomatoes. Again, if they’re store-bought tomatoes they may have been gassed in order to ‘ripen’ them while their still green, and eating green tomatoes is okay too. Ever hear of the old 80’s movie, Fried Green Tomatoes? Anyways, if your tomatoes are home grown, then your assured of the safety of your own produce. Place the sliced tomatoes and cucumbers in a bowl and set aside. Next slice up some red, white, and yellow onion (if you have any on hand and this is optional). I’m kind of basing this on my late grandma’s recipe but without the dressing. My grandmother used to use white onion cut into rings.


I also like to spice things up with a fresh cut Japeno and throw that in with the cucumber and tomatoes and mix some crushed red pepper as well. I then give this salad a soak in a little Apple Cider Vinegar/ distilled bath just for good measure, rinse and return to the bowl. I like to finish off with a few snips of fresh Kale (the yellow blooms will produce a delicate sweet taste, too), Parsley, Chives, Peppermint, Spearmint, Pineapple Sage leaf, one leaf of cabbage and fresh Brussels sprouts (never the canned or frozen variety for me). So technically its not a straight cucumber and tomato salad, rather an actual salad. Eh, sometimes I enjoy a change of pace.


What to do with those celery leaves: don’t throw them out! Wash them off really good and dry them. I say this because the cost of buying celery either in seed, salt, or even the crushed leaf variety can be expensive. Since I don’t have a pestle and mortar I can’t grind the leaves  into a powder so it’s the very old-fashioned ‘drying’ method by placing the celery leaves (preferably washed, dried off, and place on a cookie sheet or in my case a pie pan lined with a coffee filter will do. Allow the celery leaves to thoroughly dry for two weeks or a month or so. When they’re completely dry (and some might be curled), then you can store them in a spice jar or use them immediately in soups, stews, stir-fry, etc. I had great success drying two bunches of half priced cilantro for a month and yielded two huge batches to last me a year or better. Cilantro goes great in homemade pico de gallo (Mexican condiment/ salsa).

Hope my shoe string budget kitchen tips help. Thanks for liking, re-blogging, commenting, sharing, tweeting, I truly appreciate it. 🙂

My homemade skincare/ hair care aloe vera lotion: a how-to guide with step-by-step pictures:

Published May 14, 2016 by AntiqueMystique1

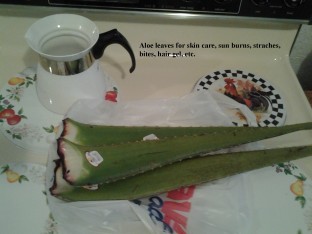
It will cost about a dollar or less for the aloe vera leaves depending on your geographical location, and if your supermarket stocks these huge leaves since they might likely be considered a ‘specialty’ item and hard to find/ purchase. I know before we got a new grocery store, I had no idea aloe vera leaves were sold fresh much less grown for their edible purposes as well. In fact, I had never seen a large aloe vera leaf in person until I popped into the new grocer to see what all the hubbub was about. And what I found was some very new and somewhat exotic edibles such as aloe vera and cactus leaves (when boiled cactus leaves are very similar to green beans and freeze well, too) which I’ll blog about here in a little bit in a separate post.


Before I spent any money on the aloe vera leaves, I did my research. I scoured youtube to see what others had to say about fresh aloe vera leaves. It turns out I learned of the many benefits of aloe vera and cactus leaves. I had seen whole cactus leaves being sold at some other grocers between $5-7 dollars and you only received two small cactus leaves that you had to then go to the trouble to de-thorn, slice, chop—essentially ‘prep’ the old-fashioned way. I watched several youtube videos on how to cut up a cactus leaf and the thorns fly everywhere even when using a plastic bag and scrapping them with a paring knife. Sounded like a potential whacking off a digit accident waiting to happen.


I did more research late at night while waiting for my [then working] off-balance washing machine to finish thrashing another load of laundry. After watching about ten ‘how to’ cut aloe vera leaves and boil cactus leaves youtube videos I decided to give both the aloe vera and cactus leaves a try.


Are the aloe vera leaves edible? Yes, the gooey clear gel is edible. However, if the slime is yellow this will act as nature’s laxative and it’s highly recommended to discard the yellow stuff. In small quantities the aloe vera leaf gel can be blended into smoothies, chopped up and frozen for later use for skin application and/or used in DIY olive, coconut, and argan oil hair mask treatments. I even found a use for the aloe vera leaf itself and like to cut it up, bag, label and freeze them for later use when dry shaving my legs or whenever I might need something quick and handy for rubbing on my skin or through my hair to make it soft. I usually run on a very erratic schedule, so yes, there’s going to be prep work involved which should take about 30-35 minutes and you’ll have to set aside time to cut the aloe vera leaves. I find that I can make this aloe vera gel last me about a month (conserving it that is) and stretching it with some steam-treated distilled water. Never use city tap water as that can contain bacteria and other nasties that can’t be filtered out in a city water treatment facility try as they might, plus if the city fluoridates their water or its hard water that’s really yucky!


“Make sure it’s steam-treated [distilled water], not the other kind,” That was sound advice from my dear dad a year ago. He’s been a health nut long before I was ever born.


Here’s the steps I use for making my homemade aloe vera lotion. Oh, and this must be kept in the fridge or else it will go rancid if sitting out since there’s no preservatives whatsoever when I make my aloe vera lotion.

aloe leaves for hair care

Step one: Wash the aloe vera leaf with some distilled water (never tap water) to give it a quick rinse. Drying the aloe vera leaf isn’t necessary unless you want to do this extra step.

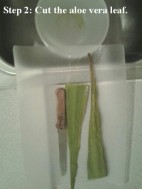
aloe vera step2

Step two: Make sure you have a bowl or other container ready. I find that placing a bowl in the kitchen sink helps and I just scrape the gooey goodness into it from the cutting board. Use a serrated knife and a cutting board as well. Also, be extremely careful when slicing these aloe vera leaves. The gooey stuff is slimy and will be the consistency of egg yoke and it gets over everything and makes work surfaces and the knife you’re using very slippery. So, do exercise caution when cutting the aloe vera leaves with a sharp knife and take your time.

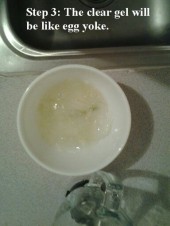
aloe vera step 3

Step three: I like to cut off the tip and end and discard those in my compost container that I plan to empty into my garden. Next, I slice downward to remove the prickly thorny sides of the aloe vera leaf. Sometimes they’ll yield a very tiny amount of clear gooey stuff and I’ll cut those into slices and place them in my freezer bag for later use. When I can help it I don’t like to discard a lot of stuff until I get as much use from it as humanly possible.

aloe vera step 4

Step four: Transfer the clear gooey stuff from the bowl and pour it into the blender. Blenders will vary and I like to start blending with the ice crushing option, then whip and puree. At this point the clear aloe vera gel should turn frothy and foamy. This is normal and the foam will settle. To make this stretch further I also pour in about half a cup of distilled water and blend it some more. Again, this will turn foamy and it will settle. I then make sure my aloe vera jar is handy and fill it. After screwing the cap on it I like to give the contents a good shake then place it in the fridge.


Shelf life of my homemade aloe vera lotion is about one week in the fridge. However, I’ve been able to make my aloe vera lotion last for about two weeks even a month if I’m conservative with it and haven’t noticed it going rancid in the fridge. And always whenever I remember I will pick up one or two aloe vera leaves and store them in my fridge until I need one this way I have a constant stock of them on hand. And look for the discounts. Sometime aloe vera leaves will be sold by the red tape bundle at a discount if they’re wilted. This I’ve discovered doesn’t matter much to me since I don’t use the wilted aloe vera leaves for smoothies. I use the wilted aloe vera leaves for my skin and hair care lotions. I use the good aloe vera leaves for the smoothies which I seldom make except once-in-a-while due to their cleansing/ detoxing properties.

aloe vera step 5

Step five: pour the aloe vera lotion in a glass jar. I have heard that plastic containers can leach out chemicals into food and drinks so I re-use a 10 ounce glass green olive jar for my homemade aloe vera lotion (pictured).


Hope this how-to tutorial helps for my fresh homemade aloe vera lotion. I never use any preservatives when making this. When it settles it will feel like a raw egg when applying it to the hair and skin. But no need to panic, the skin absorbs the aloe vera gel rather fast and leaves your skin feeling velvety smooth. Sometimes there might be some gel sediment that adheres to the skin and hair. I use a soft-bristle natural foot brush to whisk this from my skin and hair. When applied to the hair (a little bit goes a long way), wrap your hair in a silk or cotton scarf or any soft large light-weight material will do and keep it on for an hour, then remove the scarf and gently comb your fingers through your dry hair. Doing this step after you’ve washed and towel-dried your hair works great and makes your hair feel extremely soft and gives it some shine. I found this to be a huge relief since my area is hard water. And since I quit exposing my hair to all the fluoridated city water recently, I noticed my hair is not as limp, weighed down, greasy or unhealthy or ‘unwashed’ in appearance. Also, I don’t wash my hair daily into overkill like I once used to do years ago and saturate my poor hair strands to chemically-laden shampoos and conditioners (whatever was cheap at one time). I also re-use my fresh fruit/ fresh veggie distilled rinse water and make my own Camomile sun tea on occasion to give some high lights to my hair. Other times I keep a large pickle jar in the fridge filled with part distilled and bottled drinking water (supposedly non-fluoridated when I checked).

DO NOT use a plastic comb to brush out your hair when applying this aloe vera gel into your hair. Sometimes it will leave microscopic gel balls that can tangle the hair, so go easy when brushing your hair. This hair care process shouldn’t be rushed as I found out in my early trial and errors.

Recently, I’ve heard from many folks that strive to grow out their hair and keep it healthy advise to ditch the plastic hair brushes and combs completely, and if at all possible, do not wash your hair with city water unless you have a water purifier/ filtration system that can filter out heavy metals, contaminants and some traces of fluoride. Another hair care top: opt for boar hair bristle hair brushes/combs. And those are difficult to find unless they’re antique. I saw a ‘made in China’ boar hair shower brush at Big Lots a while back, but inset in the middle of it was a chunk of plastic as a faux loofah sponge. I’ll pass thank you very much even though I realize getting rid of all plastics out of my life is nearly impossible although little by little I am making snail pace strides to natural vegan materials as I can afford to do so.

When I need to brush my hair I use an itty bitty antique celluloid comb. The rest of the time I use my antique hair/ clothing brushes since they were made during the 1850’s/ 1900’s and have real hair bristles (not nylon even though it was produced back in this time frame). Since using the antique hair/ clothing brushes to brush my hair vs. using plastic hair brushes has made a huge difference. I haven’t dealt with many tangles when brushing my hair after it’s completely dry, that is. And I haven’t felt any knots or painful tangles in my hair either like I used to get often when using a plastic brush and comb. And I quit combing my hair while its still wet. This is when the hair is most fragile and elastic-like. It can snap, strands can fall out (often referred to hair fall out) when brushed wet, tangle and knot like it’s nobody’s business, and did I mention all of it painful if you have a sensitive scalp? It is.

Thanks for re-blogging, liking, commenting, sharing, tweeting and especially to all of my subscribers. I truly appreciate your likes, shares, etc.! 🙂

I’ll be posting some budget gourmet kitchen how-to goodies from how to grow your own celery on your kitchen window sill, drying your own spices from fresh store-bought/ patio-grown herbs, making cinnamon-flavored toothpicks, and my almost “sugar free” dessert. 😀


Aloe Vera leaves, scarves for soft, luxurious hair and Chinese chopsticks: how I discovered some remarkable benefits for the least amount of money.

Published May 10, 2016 by AntiqueMystique1

Okay, I admit, it still costs money to buy these things to get started if you don’t have them around your house. However, since I’m always cramming my cranium with more knowledge about health benefits, pros vs. cons using everyday commercial hair care products that I grew up with my entire life and studying up on tons of articles out there both in print (freebie magazines from the health food store and via the internet and Farmer’s Almanac). I used to read the Farmer’s Almanac religiously when it was inexpensive years ago. An issue nowadays will cost $6.97
 ouch! And along the way I discovered some fascinating healthy tidbits in my own pursuit of continuing my good health and overall well-being, especially from the of the dusty antique pages of my beloved set of late natural path Bernarr Macfadden Physical Culture encyclopedia. Now, I’m not saying this man is god. His methods and remedies, although outdated by today’s standards, may seem very far out there in left field, but the knowledge he presented (and updated from time to time clear into the 1940s) I find to be highly invaluable and educational. And it was Bernarr Macfadden who essentially opened my eyes to a healthier lifestyle. I also have a copy of his book written specifically for women that includes tailored exercises of the day, ditching the corset, health(ier) clothing choices although plastics weren’t invented yet when this book was written and a host of other information.

And I wanted more than just the egg hair rinse. I began my new hair care routine with the natural and health benefits of the aloe vera leaf. Sure, you can buy an itty bitty spindly aloe plants at Lowe’s on their discount/ distressed plant shelf for about $4 or maybe even at your local grocer for an astronomical amount for a little plant containing three puny leaves that look half dead
 and let’s face it, unless you live in an arid, hot year-round climate, then growing your own aloe vera in your backyard for harvesting is nearly impossible to do in cold climates unless maybe if you bring it indoors for the winter. Believe me, I tried keeping small aloe vera plants alive indoors and just didn’t have the right terrarium atmosphere for them to survive. And then again, I only knew as much as my pre-Internet knowledge allotted me back in the day. I understood that aloe vera are desert loving plants and that’s was about it. And I knew back then the juice from a snippet of aloe leaf did wonders for burns, bruises and minor cuts. However, I didn’t come to realize just how beneficial these plants truly are until just a few months back. I live in an area that do stock aloe vera leaves (huge leaves at that). However, sometimes I can find two or even three large aloe leaves bundled for 40 cents-80 cents in the reduced merchandise cooler. Even if the aloe vera leaves look a little expired, I still find that they come in useful for my skin and hair regimen since I don’t consume the juice in smoothies.


And what are the health benefits? For starters, the aloe vera juice extracted from a leaf when applied to a burn, minor cuts or even scrapes helps promote healing. But did you know you can also cut open the aloe vera leaf of that clear slimy substance and whip it up in a blender to use straight as a natural skin and hair softner?  Yep, and it feels baby soft to the touch from my personal experience, gives natural luster to the hair follicle, again based on my experience, and when added in with fruit and veggie smoothies packs a lot of vitamins and antiseptics. In actuality the extracted aloe vera gooey stuff has no taste whatsoever. The kind that is produced in the bottles is oversaturated with nasty sugars.


It is advised to avoid consuming the yellow-ish aloe vera gooey substance because this acts like nature’s fast acting laxative. And when adding in aloe vera juice to a smoothie, do so sparingly as suggested by some health advocates and avid juicers due to a laxative effect. Also, the leaves I have found to be of use long after I remove the gooey clear substance. I like to cut the leaves in chunks and then freeze them for use later on and scrape the remaining gooey substance and use that to shave my legs with (makes the skin velvety smooth when dry shaving) and it feels excellent after a hard day working outside in the heat as well.


The shelf life of aloe vera juice when blended into a frothy foam that settles in the container can be stored in the fridge up to one week. I have heard from many women who also add in olive oil and coconut oil for their hair care routines, but if you hate the greasy weighed down feel it might produce, avoid using these oils entirely. It’s all about personal preference though. Personally, I found the DIY coconut oil and olive oil leave-in hair treatments to soften and restore damaged hair make my hair look and feel really gross as though I haven’t washed it in many months. And it doesn’t help living in a hard water area with nasty, industrial waste fluoride treatments, either. And it took several repeated ACV washings to get said oils out of my hair. I have alternated with the no shampoo, or “no-poo” trials with not so impressive results, either. My hair doesn’t look dirty or anything, but it’s either dry or brittle as a result even though I refrain from using shampoos and conditioners. I do, however, find that washing in city water isn’t helpful at all. I find that I’m literally at my wits end trying to get rid of the chemicals out of my life, especially when it comes to finding a shampoo that doesn’t contain Dimetheicone and its many sneaky aliases which is a polymer silicone and used in a wide array of hair products, skin care products, etc. and I believe I when doing some extensive and exhaustive night owl reading and research into this chemical is also classified as toxic according to the EWG (Environmental Watch Group). Dimetheicone also belongs to the polymeric organosilicon compounds (silicone). It is also used as an antifoaming agent, skin protectant, and skin conditioner. It is also approved for use in food as well. Eww, I’ll pass on that second helping of mystery pie. Here are Dimetheicone’s many different aliases:


DIMETHICONE COPOLYOL; DIMETHYL SILICONE; HIGHLY POLYMERIZED METHYL POLYSILOXANE; METHYL POLYSILOXANE; SILICONE L-45; DC 1664; DIMETHICONE 350; DIMETICONE; DOW CORNING 1664; MIRASIL DM 20; VISCASIL 5M.


Whew! Now that’s a long list to add to my shopping list of no-no’s. Moving along
 the aloe vera leaf has many healthy properties. I heard it might help with anti-aging although I’m a firm believer we all grow ‘old’ gracefully and that is a fact of life. No amount of beauty creams and downright overpriced anti-aging concealers and beauty ‘add-ons’ that are pushed onto us women will amount to much, except perhaps do the exact opposite of what the products promise and could, for example, maybe exacerbate the natural aging process and help it along rather than magically ‘fix’ something that  isn’t broke. I also go by the philosophy, “If it’s not broke, don’t fix it.”


I noticed first hand the benefits of using pure aloe vera after the first week of using it like lotion. I’m not talking about the chemically-laden fake aloe vera that comes loaded with man made sugars in a 10 gallon oil drum for $1.80 at Big Lot’s. Okay, I exaggerated on the 10 gallon oil drum serving. I think it was more like 32 ounces, but still—that’s sugar overkill if you ask me. I don’t even use sugar in my evening/ morning beauty routine, although I have heard it makes the skin soft and so does pure raw honey. But skin can also absorb the sugars just the same.


I like to use straight aloe vera juice and go through one leaf per two weeks (when I can stretch it that far). It does wonders when your hair is damp and you’re drying it naturally (without heat of a hair dryer). I also wrap my damp hair in a soft cotton and/ or silk long scarf and let it completely dry. Using long scarves as in place of a bath towel or hair dryer to dry the hair I stumbled upon quite by accident and I highly credit a youtuber Steph Arizona for using scarves when applying hair masks to prevent it from dripping all over the place and also for throwing out some helpful advice on what to do with all those plastic grocery sacks that can accumulate like dust bunnies around the house. The grocery sacks make really good ‘one use only’ improvised shower caps and you’ll save a few bucks as well.


So, I gave some of Steph’s hair care tips a try and went at it with a somewhat skeptical approach at first since most of these DIY hair masks never worked for me in the past. I tried the coconut milk hair mask Steph uploaded on her youtube channel and individual results will vary. Therefore, I wasn’t discouraged when it didn’t work for me. I was only out $1.25. But I didn’t like the chemical they sneak into the Polar brand of Organic Coconut milk that I purchased wasn’t a natural ingredient and the actual coconut content didn’t amount to much. My result was my hair was very weighed down, limp and felt like it had a thick film on it that wasn’t easy to wash out even with repeated ACV (apple cider vinegar) rinses and followed up with a full strength distilled white vinegar rinse with distilled water.

Although it did make my hair look shiny and silky, it was a huge mess to wash out. I then tried Steph’s ‘rice milk’ hair mask. Although, here again I didn’t allow my rice to ferment for three days (I believe that’s what she recommended) so I didn’t notice much of a difference in my hair. And mind you I did these hair mask recipes two weeks apart to give my hair some rest. What I didn’t do was reach for the Mane and Tail conditioner or the even the vegan shampoo (found at Sally’s Beauty Supply). However, even though its listed as vegan the shampoo is still loaded with chemicals in extremely small print, so you’ll need to carry a jeweler’s loop on your person to read these ingredients on the bottle. So I only reserve the vegan shampoo when the olive oil and coconut oil hair mask blunders made my hair greasy, albeit shiny. Also, I had some success with an avocado hair mask mixed with some aloe vera juice in place of shampoo.


But since doing the scarves for the hair mask recipes, I do strongly urge to make careful buying choices when shopping for scarves. I admit I buy mine from thrift shops and often times they don’t have tags listing the fabric content. Sounds icky to buy second-hand stuff but if you add a little bleach to the wash (before you put your laundry in), this helps and believe me, anywhere I can save money, I opt for that and leave the big box retailers and online shops alone.


Also, when purchasing used scarves for these hair masks I made quite a few ‘disastrous DIY infinity scarf’ shopping blunders, not ‘buyer’s remorse’ per se since I didn’t know said scarves weren’t wide enough, but instead thin, long and slapped together likely by a newbie to using a thimble, needle, and thread (hand stitched in most cases, not that that’s a bad thing). Most of these disastrous homemade infinity scarves I do happen across are less than $1. Sometimes they’ll set me back 49 cents here and there. And if there’s a tag attached to the scarf look for silk and/ or cotton. If its polyester this is spun plastic. And rayon is even worse yet since it’s a chemical that can leech out toxins.


Oh, and some helpful buying advice: always look for the tag and read the label for the fabric content. This threw me off a few times since the scarves would lack their tags and feel like soft cotton, when instead they were still stretchy, clingy, and made of either nylon, rayon, and viscose fabrics. Since I did some major spring cleaning yesterday, cleaned out my overburdened closets and donated ten large bags today, I got rid of nearly all of my clothing that not only no longer fit me, but also contained polyester, rayon (which is a toxic chemical and potential carcinogen that can seep into your skin), and nearly all nylons (including hose, trouser socks, trousers, and tank tops). This included many of the scarves that I just recently purchased for my hair mask treatments and natural hair drying.


Then what is advisable to wear in place of all these synthetic fabrics? And what if you have extremely sensitive skin? Then what? Look at the tag in the clothing and/ or scarves before you buy them. And do TRY on the clothes before you buy them. I am a repeat offender of ‘assuming it will fit’ mentality, when in fact, it’s the opposite in some cases and it make not look good on me or it make look fantastic on the dress form, but too small around the bust or too large around the waist, etc. And why is this a ‘one size fits all’ society all the sudden nowadays?! Aw, man!


I hauled ten trash bags crammed full of clothing and that outgrew me since I lost weight and changed my diet for better and made (hopefully healthier) eating choices for myself in the long run. I’m almost completely vegan now, except I do eat the occasional hard-boiled eggs about once a month. So if I were to say I was full vegan, then it would make me a hypocrite. I am a full vegetarian though and don’t consume meat, chicken, pork, or even hamburger. I don’t even do those ‘veggie burgers’ since here again its all highly processed foods on my ‘no-no’ list.


And what does this have to do with Chinese chopsticks? Well, aside from wanting to learn how to use a pair of chopsticks (that’s on my bucket list of things to learn how to do eventually when consuming rice), I also found a new pair of wooden chopsticks today for 29 cents and they were a lucky thrift store find. There’s nothing special about them and they’re not fancy or anything. When I opened the package I was slightly disheartened to see a few splinters so I designated these pair of chopsticks as hair sticks. Hunh? Hair sticks to hold your bun in place. I found some beautiful, elaborate //ws-na.amazon-adsystem.com/widgets/q?ServiceVersion=20070822&OneJS=1&Operation=GetAdHtml&MarketPlace=US&source=ss&ref=as_ss_li_til&ad_type=product_link&tracking_id=antiquemystiq-20&marketplace=amazon&region=US&placement=B00RHL8XR2&asins=B00RHL8XR2&linkId=89fc8d0b469478d24b773175273788f6&show_border=true&link_opens_in_new_window=true” target=”_blank”>hair sticks on Amazon. So, I did a quick skim on youtube for tutorial hair stick videos and used one of the chopsticks to draw my hair in a bun and let it completely dry.


I used to keep my hair in a bun all the time back in my younger days with plastic hair clips before I fully understood that plastics are bad for the environment, etc. and keeping my hair in a bun constantly used to give some natural curls to my hair when I let it down so I wouldn’t have to kill my poor [then] chemically treated dyed hair or submit it to harsh hair spray. I used to be a fan of Aqua Net ‘concrete’ super hold hair spray back in the 90’s and that’s how we younger women got that ‘big hair’ look. Back then we called it, “teasing our hair” since the term ‘big hair’ didn’t come into vogue until about, oh
 let me think here, around 2008 when I first heard of the term, that and the saying “big hair bands”. We simply used to call our beloved rock stars “hair bands” back in the day and not to be confused with the pony tail holders.


So, I’m trying out the chopstick bun in my hair as I write this and will give an update later on. I have a very tough day ahead of me and I need to get some beauty sleep. Oh, and I haven’t packed my lunch, either. I was more pre-consumed with food prepping earlier this evening and making space in my fridge for my leftovers of mashed potatoes mixed with red and yellow onion, fresh broccoli, and Chia seeds and my one pot meal of tri-color Rotini (spinach and tomato variety) without the added man made ‘enriched’ junk. I will post my mashed potato recipe for anybody that might be interested. It’s simple and takes a few minutes of food prep work, but so filling and good after a long day of running one’s legs off. I always say a hot meal, iced herbal tea (not the cheap instant teas), and some dessert of cut up fresh banana, strawberry drizzled with homemade chocolate sauce using Baker’s Unsweetened Baking chocolate bar, two tea spoons of raw honey and a few Carbo unsweetened chips is a real treat! As always thanks for reading, liking, commenting, re-blogging, tweeting, etc. I always truly appreciate it. 🙂


Ah, it’s almost summer and that means


Published February 19, 2016 by AntiqueMystique1

It’s almost time to break out the shorts, open-toed sandals, a comfortable top or tank, and sunshine in a bottle.

What? Sunshine in a bottle fruit smoothie, that is. I recently came across a recipe for it and it looks delicious. For this you will need the following:

Glass Mason jars (any size).

Glass straws such as these or others found here as well. I know they’re pricey, but when you’re trying to ween yourself off of plastic entirely and are concerned about unhealthy chemicals being leeched into your drinks and food, then glass straws might be a very healthy lifestyle investment. Sure glass straws can be a pain to clean (some come with a straw brush) and the other draw back is they can shatter and get broken, but making any lifestyle changes come with extra work.

You will also need a juicer or regular kitchen blender. If you opt for a blender, then you might want to strain this through a cheese cloth. I’ve tried the wire mesh strainers and they end up becoming rusty after one use. And if you have a juicer that gets rid of the pulp, then great. 🙂

If you’re going the blender route, be sure to add in enough water to cover the blades first and foremost to reduce wear and tear.

Sunshine in a bottle fruit smoothie:

Take one lemon rinse, peel off the rind and slice it into chunks. You may want to remove the seeds before tossing it into the blender. Depending on what juicer you have, the more expensive models I’ve heard and read about anyway should eliminate the seeds and pulp. Also, about the seeds, some can have small toxic properties, and although its considered a very minuscule amount when ingested by eating certain kinds of fruit like lemons, oranges, and grapefruits, if the seeds do get ground up, then in turn could cause small sharp particles that can then tear the intestines. Believe me, that doesn’t sound like fun. Therefore, I take the extra time to remove the seeds, especially when in doubt.

Next you will need some Fuji and/ or about three red apples. Wash, rinse and slice them into chunks. Discard the core and seeds in the trash. Add the apple slices in with your lemon.

You will also need some oranges, peeled, rinsed, and seeds removed if you want to go to the extra effort. About two Cara Cara oranges or pretty much any type of orange should work. And you need about three. I used one bag of small Halo Cutie oranges, and prepared these in a juicer and frozen them in ice cube trays.

One pineapple. Rind removed and discarded. Next, you’ll want to cut up the pineapple. Its all a personal preference if you discard the core or use it when juicing. I’ve heard both pros and cons of eating the core of a pineapple. The pros is it contains a high concentration of natural vitamin C and other healthy benefits. The cons of the pineapple core is that it can cause fiber balls to build up in the digestive system that can be difficult for your body to break down. Also, some seeds in fruit aren’t meant to be ingested because they can contain cyanide.  So, for myself personally until I can do more research on eating the whole pineapple I would toss out the core. Yeah, I might be depleting the vitamin properties and not getting the full ‘juicing’ experience, but rather be safe than sorry.

Two Kale leaves washed/rinsed off. I would say optional on this if you don’t like mixing veggies with fruits.

Okay now that you’ve washed, sliced, diced, peeled, chopped and cored your fruit you’re ready to add it into the blender and/ or juicer and whip these ingredients together. Last night I tried making this smoothie with most of the ingredients but lacked the most vital one; the pineapple.

So my “half” sunshine in a bottle smoothie is sitting in the fridge. Today I was determined to  walk to town to get  said fruit. And did the usual errands. I also stopped in a local upscale women’s clothing boutique that sells boho (Bohemian/ Hippie-ish) inspired clothing, jewelry, Vera Bradley hand bags, wallets, small back packs, makeup bags, Hanky Panky thong underwear, and even more Chinese-produced, massively over-priced jewelry, necklaces, bracelets, earrings
 eh, I’ll just blog about all that in another post.

Tonight I plan to finish my fruit smoothie, crank out at least two other blog posts on here, do my Yoga for the night, etc. Then tomorrow I plan to get the garden cleared  and get it ready for summer. I already have most of my seeds bought and saved back as many as I could from all the fresh produce I bought at the store (roughly a year’s worth of “almost” free food if it grows and produces, that is).

Oh, and if you tried making this sunshine in a bottle fruit smoothie or anything similar, I’d be interested in knowing how it turned out. And should I find the video again of this smoothie I seen on youtube, I will post it in this blog. It looks great, but if you try to make it without the pineapple you’ll have a strong lemon smoothie instead.

Stay tuned for more. As always, thanks for liking, re-blogging, sharing, commenting, tweeting. I always appreciate it a lot! 🙂

My three-step deodorant (how-to-make):

Published January 31, 2016 by AntiqueMystique1

This was pretty much trial and error when I began my mission to quit putting unnecessary chemicals into my body over three years ago. I researched, scoured, and tried many ‘all-natural’ health food store deodorants with less than impressive results. And it was only after the fact when I would arrive home and read all the ingredients of said deodorants.

How much money did I end up wasting? About $30 per month!!! For that price I could have very easily made my own deodorant and still have money left over.

So, I kicked all those mineral salt deodorants and Tom’s of Maine to the curb. I pitched out all cheap store-bought deodorant brands too, especially the kind that contain aluminum, which by the way, from what I’ve read extensively about, the body doesn’t NEED aluminum. Aluminum could be a cause of bone disorders, kidney problems, Alzheimer’s, breast cancer. Therefore, to eliminate these risks I looked through all of my daily beauty products. I was quite shocked to find Ivory soap “the soap that floats” does contain that sneaky beauty industry word, “fragrance”. This means Ivory isn’t 100 pure. Also, whether or not it really does as advertised to kill 99.9 % of germs leaves a lot to the imagination. If it’s a bar of Ivory it will collect bacteria like a Petrie dish.

Throughout the summer of 2015 I experimented using nothing more than a lemon slice daily. And believe me if you have sensitive skin this will burn like a three alarm fire! Lemon slices were out as far as home made deodorant alternatives were concerned in my case. I looked into using just baking soda, but found I had to re-apply it quite often and it sweated off in less than five minutes. Also, some generic and well-known brands of baking soda can contain aluminum which could account for me breaking out into rashes and having it make my teeth hurt when I used to brush with it in place of store-bought toothpaste.

Well, gosh darn it! So I did further research and came across some home made deodorants using Arrowroot Powder, but the stuff’s expensive. For the meantime, I just wanted a ‘go-to’ home made deodorant. While I was reading up on the benefits of raw organic coconut oil (like oiling pulling where you swoosh a spoonful of coconut oil in your mouth the very first thing 20 minutes upon getting up and on an empty stomach). Not only is this anceint techinque suppose to help draw out toxins, it’s also supposed to help your oral health and whiten teeth as well. I also read about coconut oil’s deodorant properties too. I then discovered there’s many more uses for hydrogen peroxide other than just using it to treat cuts and scrapes. Hydrogen peroxide also has deodorant qualities. I tried this and almost got it to where it worked for me, but it wouldn’t stick. Hmmm…

For the final test version I dusted off with Rumford aluminum-free baking powder. The results? Excellent!

Here’s my three step process I’d like to share with the readers. If you like, you’re more than welcome to pass this along. I don’t know how well this will work for every individual since everyone is different, but here it goes:

Wash, shave (if you need to), and pat dry your underarms. I do this exclusively as part of my morning routine. I haven’t even begun to master tweezing and don’t ever foresee myself getting the hang of that. Shaving is still very quick for me and less of a hassle.

After your underarms are dry, smear some raw organic coconut oil on your fingers and apply this to the underarms making sure to get a generous amount rubbed into the skin.

Next, soak a piece of toilet paper with Hydrogen peroxide and dab this to the under arm area. Since I haven’t found an easier solution to apply hydrogen peroxide without a piece of toilet paper, this will have to do for now. I’ve tried using cotton balls to no avail and even tried using a facial scrubbing pad with messy results since the hydrogen peroxide doesn’t absorb into either material. It just dribbles all over the place.

And last, using a big makeup brush (or powder/ blush brush), dip it into the Rumford’s aluminum-free baking powder and dust it under the arms. Depending on whether or not you’ve shaved recently this might make sensitive skin hurt and/ or turn red. The redness goes away as long as there’s no razor burn or scrapes. And the sensitivity might lessen. Don’t apply this to broken or irritated skin, nor rub in the coconut oil with sharp fingernails. Believe me, this hurts really bad!

Things you’ll need:

Two makeup blush/ powder brushes. Since I use just one for now I often have to wash it out every other day to prevent bacteria buildup. Having two would come in handy while one is drying.

Hydrogen Peroxide (any brand) although I’ve heard there’s a lot of difference between brands.

Rumford brand aluminum-free baking powder (this can be found in most health food sections of a grocery store and/ or health food vitamin store). The container comes in a red can with a tan-color plastic lid. This baking powder sells between $2-3 dollars depending on location.

Raw Organic Coconut oil. I personally haven’t noticed a difference between cold pressed virgin coconut oil or any other less expensive store bought brand. I use whatever coconut oil I have on hand. I used to buy coconut oil by a brand called Spectrum, however, my store quit carrying it. It was also great for baking too.

And there you have it. I hope this is helpful for everybody. I also did this as to get away from the name brand/ store bought deodorants that have been known to be linked to certain types of cancers. And especially for women since some commercial deodorants have been linked to lumps in the breast tissue and lymph glands under the arms as well. By cutting out the use of deodorants exclusively, it’s my belief that my body is thanking for doing it.

And one other thing before I close: what you eat and put into your body has a lot to do with how your body sweats out the toxins and the odors that it’ll release. For example, if you eat a diet rich in red sweet onions, white onions, garlic, then you’re body will secrete these causing body odor that’s very unpleasant. However, I’ve heard from others who are on raw veggies/ fruit diets say that the body odor is almost eliminated and it all boils down to one’s own chemistry, sweat glands, etc. As always, thanks for liking, re-blogging, sharing, commenting, tweeting. I sincerely appreciate it. 🙂